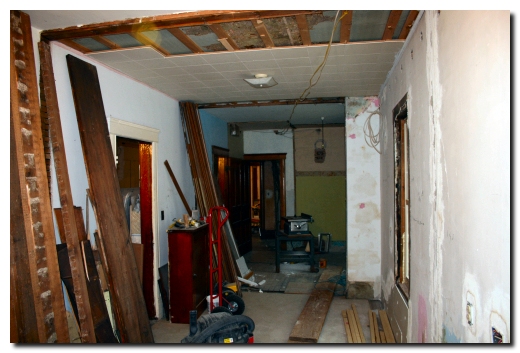
Work has continued on this project throughout the summer and into the fall. With the furnaces installed it is now time to turn our attention to the second floor apartment project. All the tear out and demolition is completed at this point with the removal of 4 dividing walls between rooms. From this vantage point, which is the northeast corner of the building, we are position in what was once a bedroom. Looking towards the front of the building there have been two walls removed, which separated the two bedrooms and bathroom on this rear apartment.
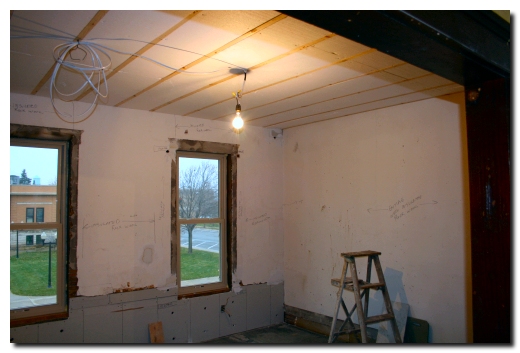
One of the primary complaints from former tenants in these apartments was how cold the place was. The radiators provided plenty of heat and we suppose that when coal was used as the fuel it was cheap and the original owner probably just cranked up the heat and didn’t worry about it. The attic above this apartment has been insulated in the past and as we know, attic insulation is the most important to the overall comfort of a living space. But as important as it is, without sidewall insulation it is a real struggle to keep the place warm. So this fall we have been preparing the structure for sidewall insulation, more on that below. The picture above shows the old "front room" of the front apartment and is the room that makes this apartment for us. It overlooks the town square and will provide us with a great vantage point to watch the activity below. Since the ceilings are cracked and stained from prior roof leaks we have decided to use furring strips and new sheetrock. Although the ceiling is well insulated we are adding an additional 1-1/2" of Styrofoam insulation between the strips for added insulation (R-Factor 6).
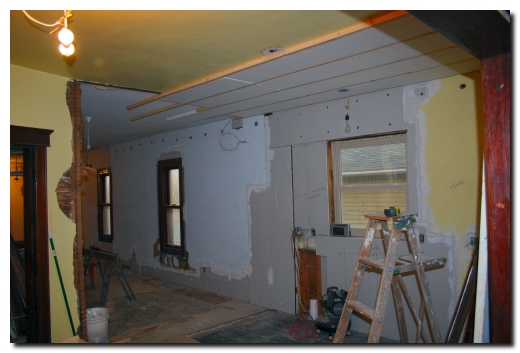
In the picture above we are standing in the door between the old front room and the kitchen that serviced the front apartment. You can see the new window that will be over the future kitchen sink and of course if you look closely you can see the scar from the old wall that separated the front apartment from the rear apartment. The large area in the background was the rather substantial living room of the back apartment and will become what we will call a family room when the apartment is completed. There are 1-inch diameter holes at the top and bottom of all the outside walls for the insulator to blow in cellulose insulation. We patched all the open holes in the outside walls where we pierced the wall for wiring and other work, this makes a tighter cavity for blowing in the insulation. Some areas are patched over with new sheetrock as the plaster was rotten and loose from the lath. When the insulation is completed we will cover all the exterior walls with a vapor barrier and 3/8-inch sheetrock. We have not completed the ceiling work in this area and of course need to replace more windows on this south side.
Return to Brey's on Seventh Project Page