Luscombe Sedan Model
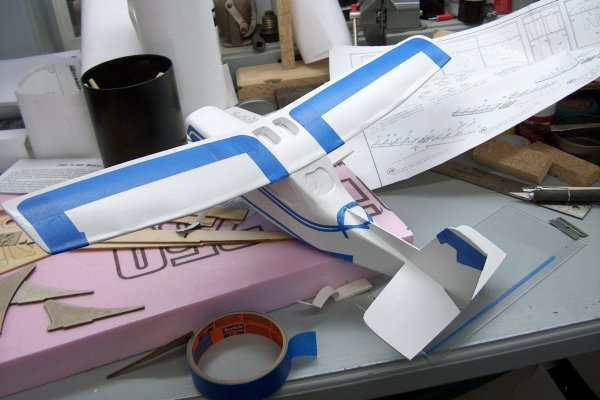
As mentioned earier, the model instructions cautioned that painting could add too much weight and reduce the flight distances. But the instructions did provide great detail on the paint scheme to be used for applying colored tissue or as a guide if paint was desired. I began the paint by applying two coats of Krylon white primer, sanding with 400 grit paper between coats. This removed all the fuzz from the very soft balsa wood. Note the two slender sticks to the left of the airplane. These are the wing support struts that I left off to make painting easier. 
This close up is the first picture of the model that shows the completed model and its classic shape. Note that I taped the landing gear wires to prevent paint build-up. I did not mention the engine cowling during the assembly pages but this is the only plastic part on the airplane body. It was a heavy vacuum formed piece that had to be trimmed and fit to the fuselage. I used a gel super glue to hold it in place and then the light weight wall patch to fill in a few small gaps where it did not fit perfectly. With the primer dry and smooth I applied three coats of Krylon satin white paint to the entire model to give it a very smooth finish. 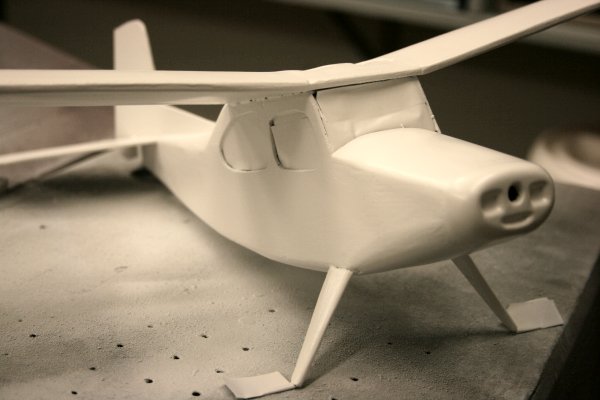
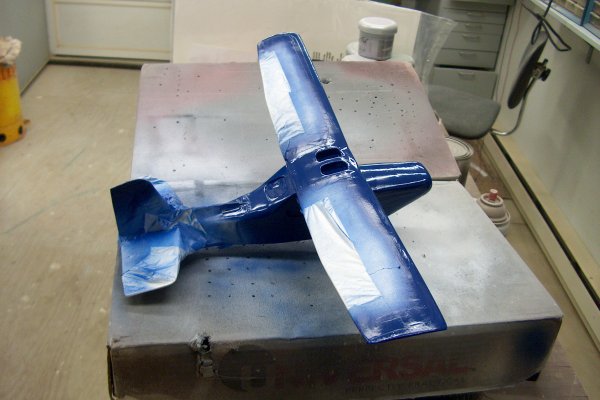
I let the finish coat of paint dry for three days before starting the next step, which was applying masking tape to add the dark blue feature stripes. I could not find any 1/8" masking tape for the curved shapes so I built a jig to cut these thin strips. You can see this jig under the tail of the airplane. It is a piece of 1/8" plexiglass that I scored with grooves 1/8" apart. I laid masking tape over these score marks and used a razor blade to cut the strips, which worked out perfectly. I used the instructions to guide the masking and once I had the feature stripes determined I used a shopping bag to completely cover the rest of the unpainted areas. With it completely masked and draped I applied another coat of Krylon satin white to seal the tape edges to prevent any paint bleeding that can occur.
I used a small can of Forever Blue by Krylon to apply the blue to the unmasked areas. I like the Krylon paint because it dries quickly and gives a great final finish. This color is full gloss and a very rich color. After these coats of paint dried to the touch I carefully removed all the tape and draping and left it set overnight. Then I applied two coats of satin latex polyurethane to complete the finish on the aircraft. I like this final finish as it provides a uniform sheen to all the paint surfaces and helped flatten the ridges caused by applying the feature stripes.
With the painting completed I removed the cabin masking and cleaned up the window edges that had some paint build-up. The final assembly could now begin. 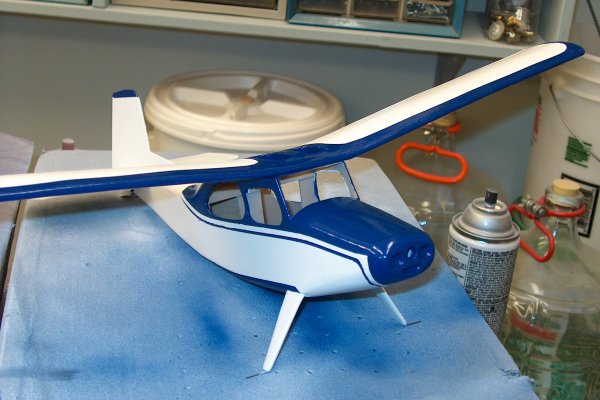
If you have any questions or comments please feel free to send e-mail. If you do not see a menu bar on the left you are missing a lot more information like this on www.breyfogle.com |