Step 1 for all these additions is to get the foundation work completed in as short a time as is possible. Unfortunately in our haste to get this project moving we failed to take any photographs of the digging or foundation work other than the picture below. Again this year we did hire an escavator to do the digging since there was some hauling to do and a driveway to be raised and packed.
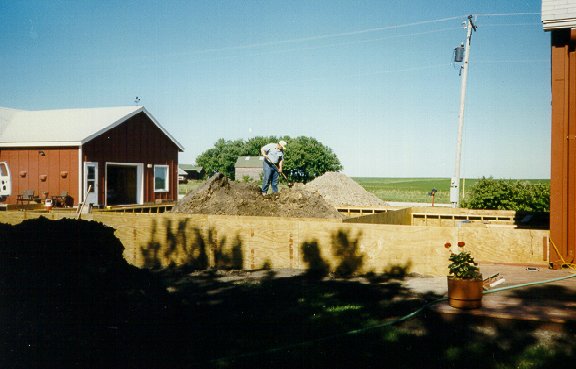
We used the same wood foundation system as in the other projects and for the first time used the escavator to move the rock into the trenches and get it leveled out. This was a real time saver for me and really saved the back. I also had them fill the garage floor area with dirt that was part of the escavation and in the picture above I am tamping and finishing the backfilling in preperation for concrete. This foundation work included an extension of the basement for new stairs so we could remove the old stairs from the middle of the house. As soon as the hole was completed I broke an opening through the basement wall and removed the old fuel oil barrel that had been built into the basement back in 1930, or so we assume. The tank was bigger than the basement door so it could only have been lowered into the basement before the floor went in.
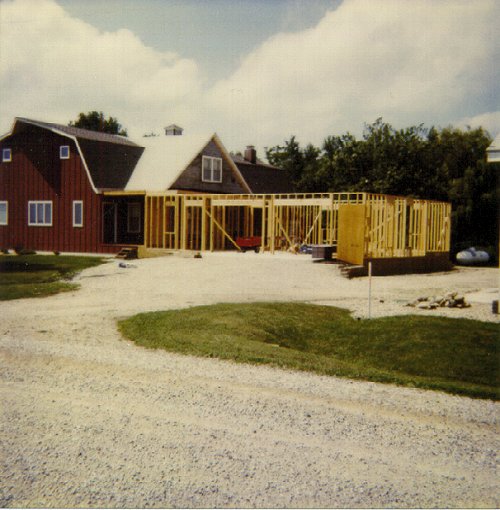
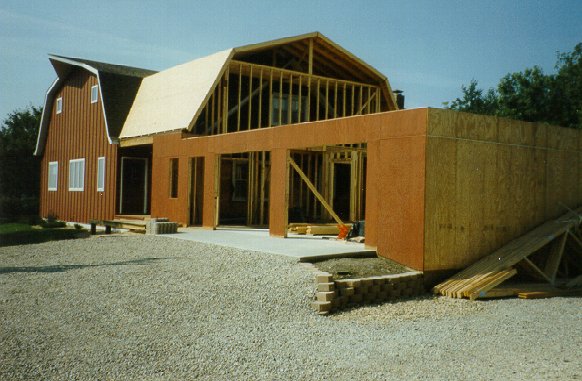
Somehow we can't come up with any photographs while we were framing the project until we came across this Poloroid when we completed the wall framing. The framing went quickly after we poured the garage floor, which was completed in three pours. This phase of our project was the most fun at this stage as there was no danger of roof leaks or other probems involved with cutting into the established house.
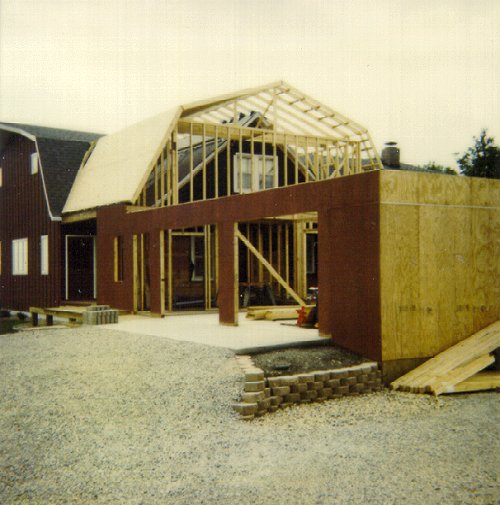
The next step was to begin the hand framed roof section that would cover the rest of the old gable roof. If you look closely you can see where I gut into the peak of the old gable roof so the west rafters could meet the new ridge pole. From the very first drawing that I made of this project this step was much anticipated as there was no positive way to get an exact measurement to determine if my plan would cover the old peak without removing it. But it worked with about 3 inches to spare. The fact that I had to cut into the library and entry roof addition did not give me much concern about rain since it was so steep that there was little risk that any rain would work through. Luckily I had this all closed up before we got any rain to test my theory.
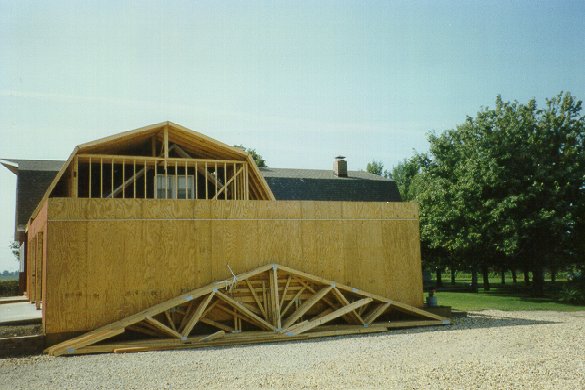
To make this project go quickly I ordered a set of trusses to complete the garage and laundry room roof section. This was called a hip set and included the common rafters as well as the smaller hip sets. You can see these stock piled against the new garage wall waiting for us to install them. But first we finished all the sheathing on the walls and gambrel roof section.
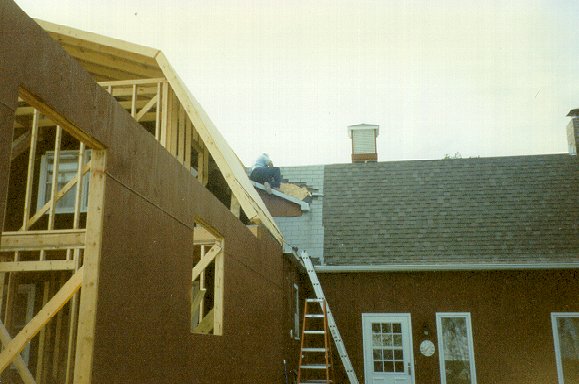
Before moving on to the truss project I decided to finish up the dormer project on the west side. If you have looked at the 1994 project you will remember that I decided not to remove the dormer because of all the rain that year. So the picture you see below shows me preparing to rip into this area. I had to remove the shingles and some of the sheathing above the dormer so I could get to the old dormer framing. Then it was a matter of cutting away enough framing from the 1930 structure to get new rafters past it and finish the new roof into it. I started this project early on a Saturday morning and by night fall I had it all closed up and covered with felt to prevent any water problems.
The last of the Poloraoid photographs shows the trusses installed. We had very good luck carrying these in the garage doors and then sliding them onto the walls before raising them in place. We did have some difficulty with the hip set of trusses. The truss company made an error in calculating the set and we had to do some hand framing between them to complete the hip rafters. Luckily the work went quickly and we moved onto the shingles.
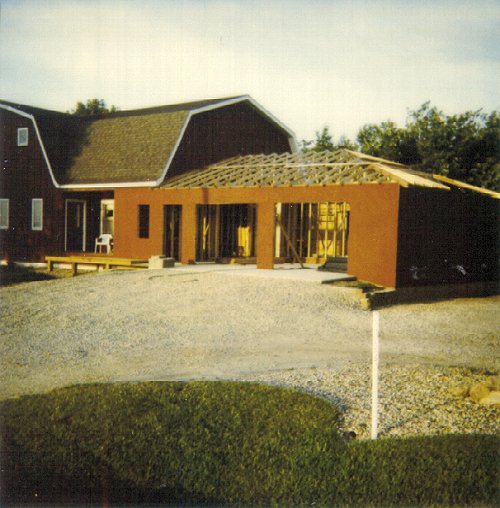
This was the largest but easiest addition that we put on the house. Framing around the dormer and west gambrel were the most challenging but the rest was more like building a new house and the work moved very quickly. The picture below shows the new additon with the shingles and sheathing in place. As with the other additions Sandy did a lot of painting in advance to cut the time needed to finish up.
I did not mention at the out set that we did have a bit of a budget problem with this addition and had to delay some of what we planned until 1997. Windows were the biggest issue since they involve a lot of expense. You will notice in the finish picture below shows the back view before we closed up the remaining openings. But if you look closely you will notice that we did not put in a new kitchen window and the old existing kitchen window was still in place.
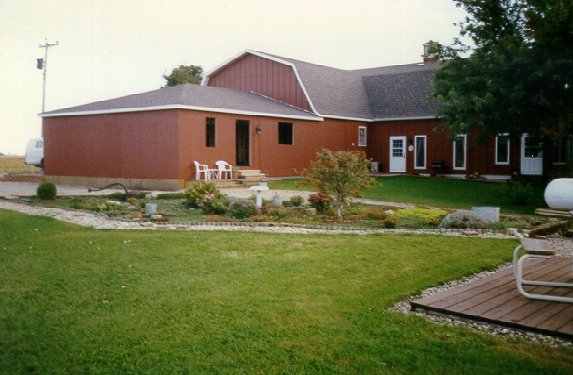
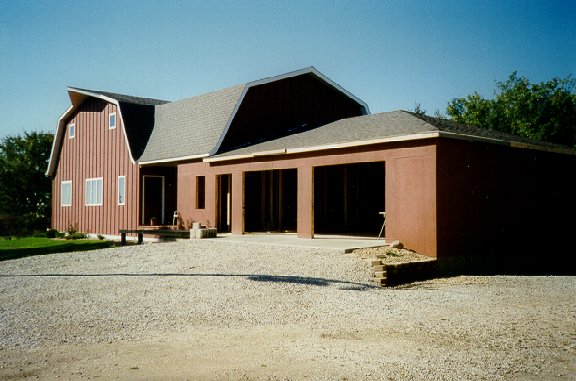
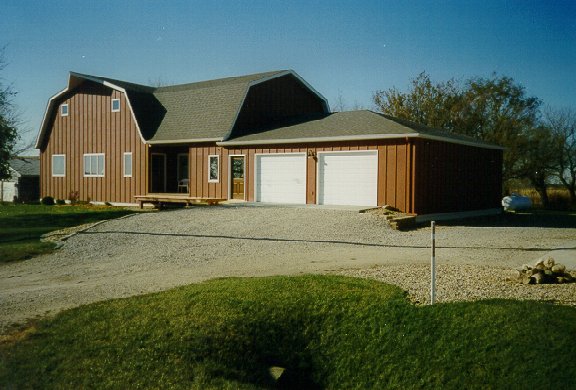
The final picture below shows the front side of the house with the garage doors installed. But again notice that there are no windows on the north side of the garage. Our plans included using the old family room windows here and to put new ones in the family room. But with a tight budget we decided to wait for the next building season. The other window not installed but not clearly visible here is the dining room window. It is difficult to see in this picture but the leaves have fallen on the poplar and elm trees toward the back of the backyard so time was getting close to button things up for the winter. Every year we think of our first winter here and how quickly the season can change so try to get finished before the end of october.
Return to our projects page.