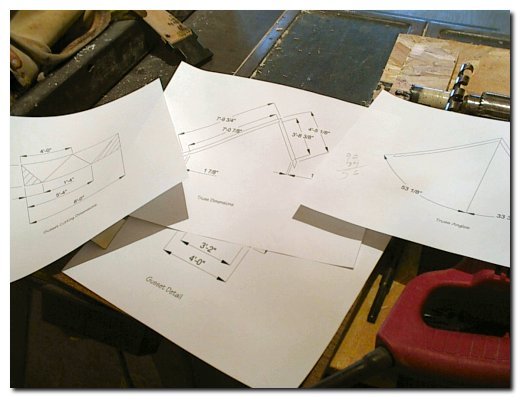
The rain that stopped our work on Saturday lingered through the middle of the morning and we got 1 1/2" of rain so everything was pretty well soaked. But I had plenty of work to do in the shop and on the roof trusses for the shed. I was unable to get back on the office sheet rock finishing because the unheated office dropped down to about 45 degrees overnight and the joint cement was not dry enough to cover again. So I went to work on the roof trusses. I laid them out using my CAD software but didn't trust my work enough to start chopping up wood without checking the cuts. The picture above has two rafter top cuts and the bottom cuts marked. The CAD system was right on the mark so I could start cutting the pieces and all the detail drawings I made of the assembly paid off.
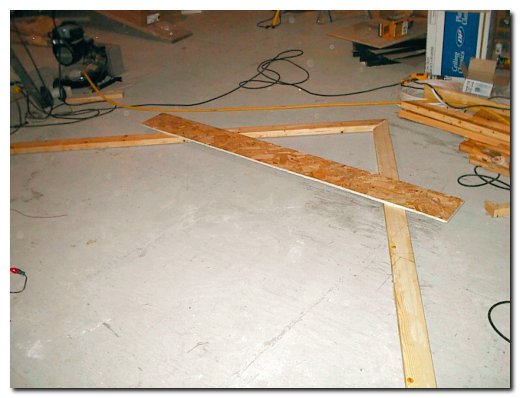
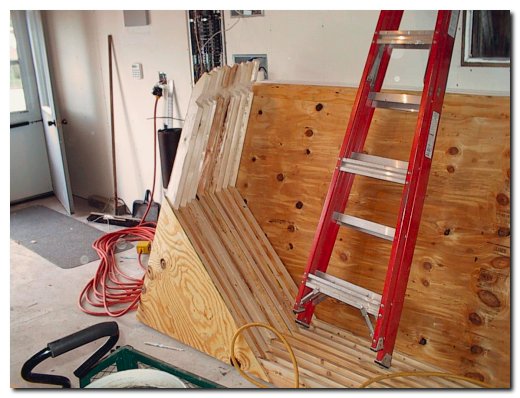
The roof design is features a steep short slope on the front and a longer shallower slope on the back. This is further complicated by the fact that the front wall is 1 foot higher than the back wall. The interior of the shed will have a vaulted ceiling with a flat portion at about 9 foot off the floor. This flat area is framed with a 2 X 4 and then a 1/2 plywood gusset holds it all together. The picture below shows the jig I made on the floor for assembling the 4 pieces that make-up each truss.
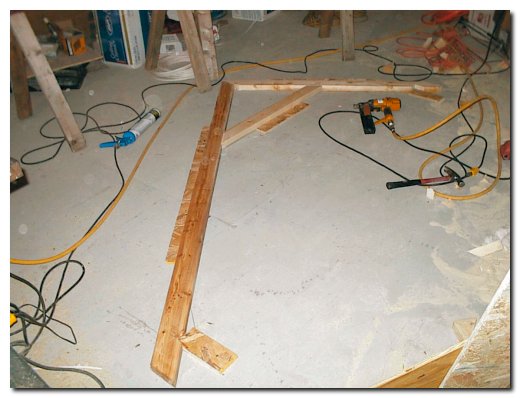
I used construction adhesive to glue the gusset in place and then sheathing staples. This made a very rigid assembly and I finished all the trusses by the middle of the afternoon. I stacked all the trusses in the shop garage before going out to continue framing the shed. The clouds were clearing and the sun was making it warmer than yesterday so I thought it would be a great time to finish up the wall framing. Unfortunately the rain clouds blew back in so I wasn't able to get all the framing completed.
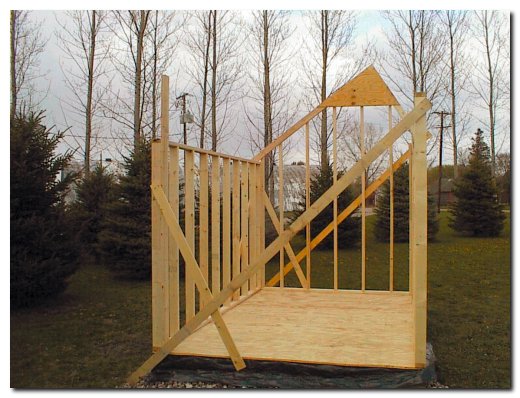
We did get the back and one end wall framed. The end wall is a little strange to frame since I did not want to use a top plate and then need to fill in the gable end studs. So I used a bottom plate and ran the studs wild and held them together with a temporary 1 X 4. Once the first rafter was spiked in place I cut the studs off below the top of the rafter.
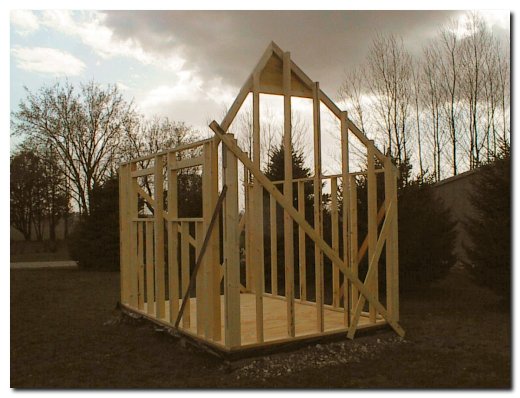
The plan is to install the siding on the end wall then the two long walls before doing anymore framing. This will tie all of the structure together before I start installing the trusses.