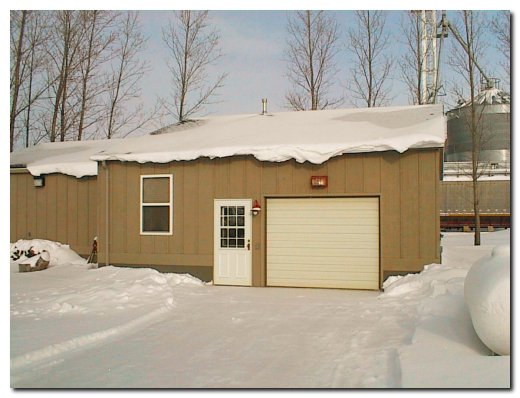
The ice of last weekend is still hanging about, but now it is covered with a 9-inch snow fall. I just had to take this picture of the snow hanging over the front of the shop as I prepared to begin work this morning. I did knock the drift off the edge so I would not fall of later and make a mess. The outdoor temperature had dropped down to the low single digits overnight but I was pleased to find the shop garage still at 36 degrees.
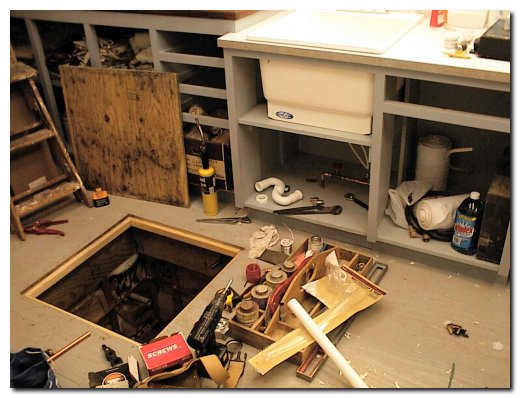
During the work week I had picked up a water heater and all the fittings I would need to install it, but as I went to work this morning I hadn't really planned on installing it. I wanted to make sure I had the right fittings and before I knew it I was installing the water system plumbing. I began by cutting off the fencepost that I has used as a temporary prop for the water line and then installed a vaopr barrier on top of the rock floor. I had planned a wood floor in this area all along but was in no big hurry to start it as I knew it would be a tough project. But once down on my knees in the rocks I decided it was time to install instead of trying to work over the rock.
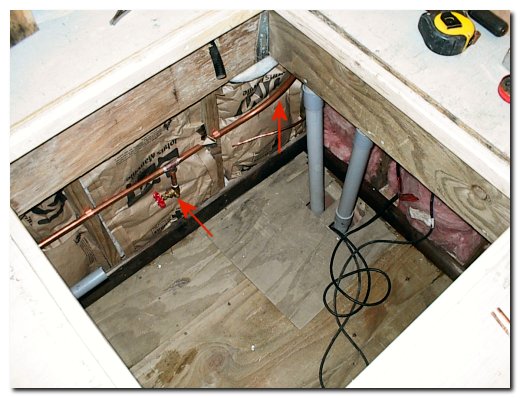
In the picture above you can see the floor that was installed by nailing pressure treated 2 X 4's onto the sidewall framing and then screwing pressure treated playwood in place. I notched the flooring around the wall studs and other obstructions. Then I fit pieces between the studs to close up all the gaps that were needed so I could slip the flooring in place. The red arrows on this picture show the copped line as it comes from the sink base and attaches to valve. This vavle will be used for draining the water from the supply line in the event that I want to shut the water off to the shop. You can also see a loose piece of plywood in the corner of the floor, this covers the 16" tile that houses the sump pump.
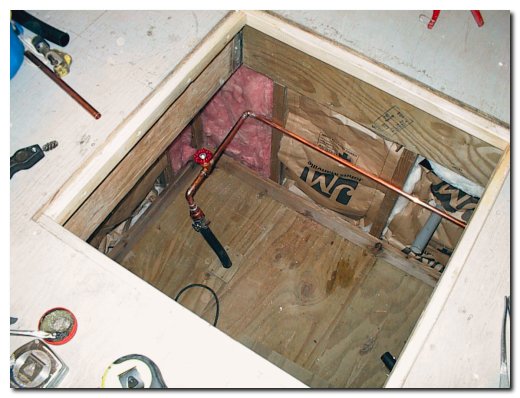
This final picture looks at the opposite corner of the crawl hole. The black PVC pipe that comes out of the floor is the 1" water line installed when I started the shop. I cut it off and used a fitting to convert it to copper and also installed a shut-off valve. I had to be sure that the heat from the torch did not melt the plastic fitting so this required that I had to make the entire assembly before installing it on the plastic fitting that slipped into the black pipe. This assembly included a 1" FPT to 3/4 sweat fitting, a 3/4 to /12 sweat fitting and then a short piece of pipe that attached to an elbow and other pipe. This pipe fit into the shut-off valve and another piece of pipe. Once this was cool I threaded it onto the water pipe and then sweat the final elbow. I also made the pipe assembly under the sink for the cold water line and got the faucet installed on the sink before quitting for the day.