Luscombe Sedan Model
The next step in construction was to begin the wing assembly. The instructions provided scale drawings of each wing and the center cabin roof section. Using the copies I had made, I covered them with wax paper to keep the glue from sticking to the drawing and laid out the spars, ribs, and leading edge. Once pinned in place I applied glue to all the joints and left wing section to dry over night. I used a piece of 1 1/2" styrofoam as my work surface that really made this assembly step easy. 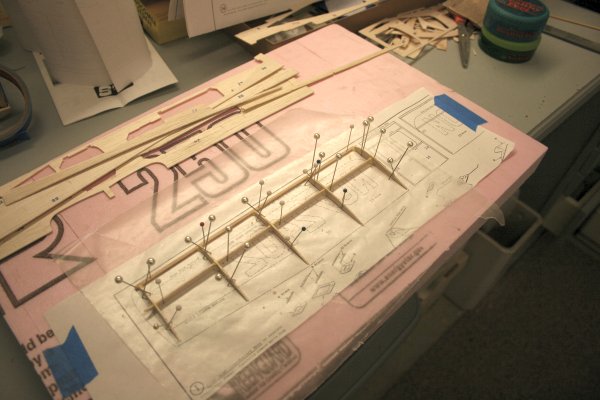
Leaving this very fragile assembly to dry turned out to be a wise decision. It was very sturdy the next day and I was able to glue the framework to the underside of the wing and once it was dry I used clothes pins to hold the upper wing surface over the curved ribs. The right wing frame work and cabin roof section are glued up and waiting to dry before they are assembled. 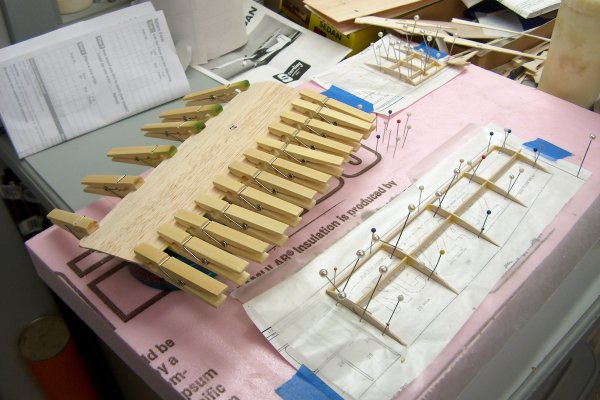
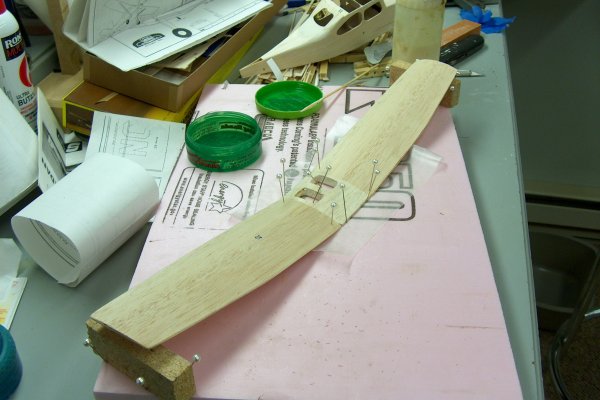
The next step required a great deal of work prior to applying glue. The instructions stated, "glue the wings and center section together with the wing tips 1 1/4 above the wing root." The instructions did not reference how the glue was supposed to hold the assembly when the angle between the wing and cabin was not built into the assembly. Essentially the wing and cabin roof section were 90 degree angles so I used a sanding block to sand the wing ends to the proper angle. I propped the wing up on the blocks I cut to 1 1/4" and set the sanding block on the work surface and slowly sanded the edges to the proper angle. I also sanded the cabin roof edges to a true 90 degrees so the fit between the two surfaces would make a proper glue joint.
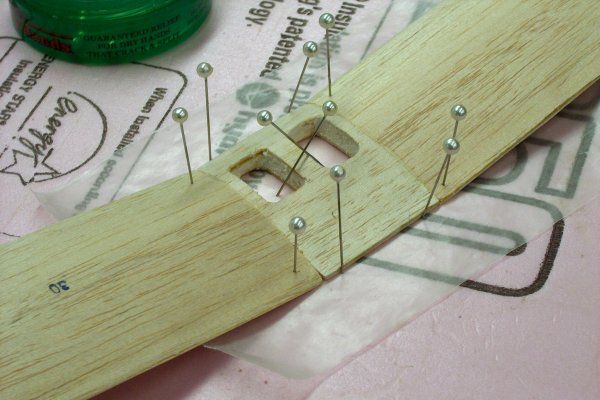
The close-up below shows the proper fitting joints and the pins I used to hold it all in place as the glue dried. This glue set-up was left to set overnight again as I was concerned that it would crack apart if handled too soon.
When dry this assembly was very strudy and I sanded the entire wing to shape. The leading and trailing edges had to be shaped properly with sandpaper and of course the wing surfaces sanded smooth. Before gluing the wing in place I painted the underside of the cabin roof to match the cabin interior. The plan did not call for this step but with all the different pieces of wood and glue joints I thought it would look better painted. I was careful to dry fit the wing and did not apply paint to the glue surfaces. You can see the finished fuselage behind the wing and note the masking tape I applied to the interior of the cabin to prevent over spray when I began painting the exterior. I had to be careful to make sure all the tape could be removed through the windows once the painting was completed. 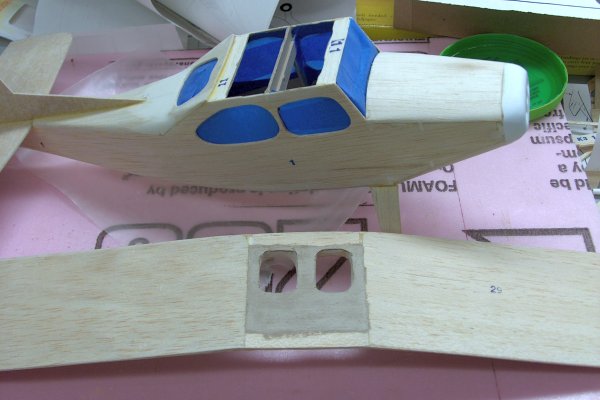
The instructions, at times, over simplified the steps in the construction. The next step stated, "glue wing assembly to the fuselage and let set until dry". But prior to this step I took at least an hour to shape the top of the fuselage to get a proper fit for the wing assembly. One bulkhead ran across the middle of the cabin roof, just behind the roof windows, and I had to remove some of it so the wing would set down on the glue surfaces. With the masking of the interior of the cabin, the shape and location of the glue surfaces, and the need to balance the entire structure, getting this assembly glued was a challenge. I applied glue to the surfaces and held the wing in place for about 15-minutes as I was unable to apply any clamps. With the glue somewhat set I balanced the airplane on its roof and applied a bead of glue on each side of the cabin where it met the wing. 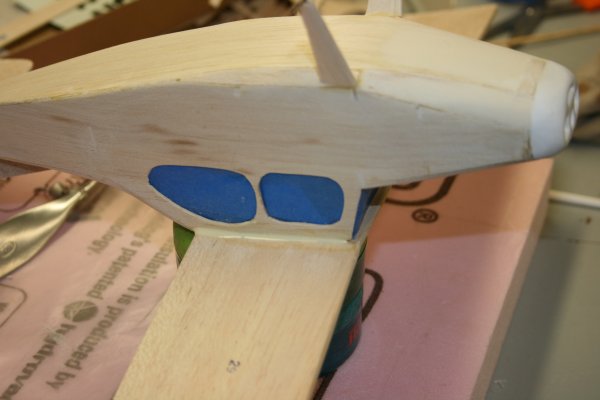
I did modify the basic design of the airplane since I made the decision not to fly it when finished. The instructions called for a single piece of balsa wood glued to the landing gear wire but not the fuselage to allow it to flex when the airplane landed. This looked like a very fragile assembly and would leave the airplane looking unfinished. So I made additional pieces of balsa to match those supplied and made a groove down the center to allow the landing gear wire to be sandwiched between them. I applied plenty of glue to the pieces and also glued it solidly to the fuselage. I shaped the final assembly and was pleased with the finished look. 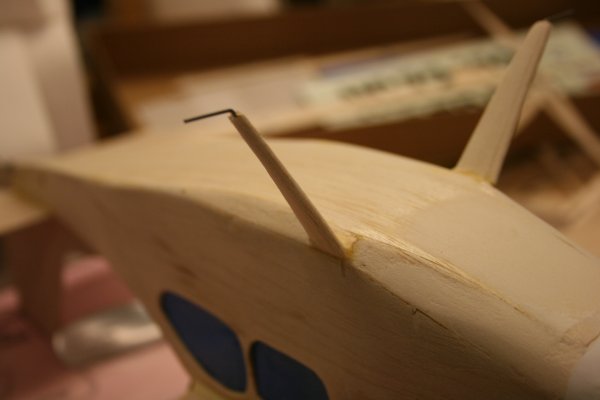
The other modification was the tail wheel assembly. The kit provided two die-cut pieces of balsa wood that were glued together and then glued to the surface of the tail. I did not like the overall appearance of the assembly as it looked clunky and shaping it with sandpaper would not produce much more than a stick with a bump on the end. The other concern is that the model manufacturer made both pieces with the grain running in the same direction so there wasn't even the advantage of cross grain assembly giving it some strength. So I went on the search for a tiny wheel to give this detail some realism. I found a small Hot Wheel car in the kids toys that had two wheels missing and nearly destroyed with hard play and decided to make use of it. I had a piece of stiff landing gear wire left so I bent it to scale of the balsa wheel assembly and epoxied it into the tail section. The wheel does not turn but it is a realistic looking tail wheel. 
This completed the assembly of the airplane so it was time to finish sand the entire airplane. I used a little lightweight wall patch to fill in some of the notches and other inperfections to give the final assembly a little more sleek look. I did check the balance as outlined in the instructions and found that it was slightly tail heavy without the washer in the nose, but since it wasn't going to be flown I didn't let that concern me. The square hole near the tail in the picture above is for the small dowel to hold the rubber band and this is installed upon completion. You can also see the outline of the access hole for stringing the rubber that I nearly forgot to remove before painting. If you have any questions or comments please feel free to send e-mail. If you do not see a menu bar on the left you are missing a lot more information like this on www.breyfogle.com |