
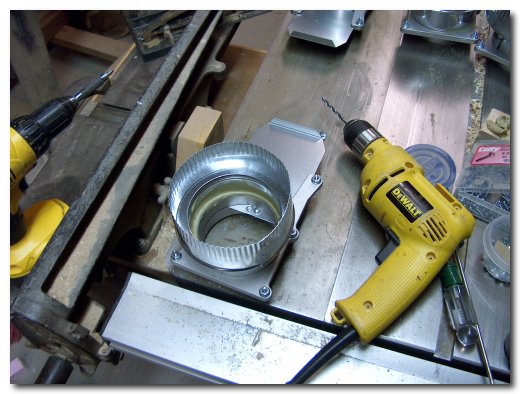
The blast gate mentioned on the previous page is perhaps one of the most critical devices in an efficient dust control system. It allows a shut-off for each machine and also can be used to balance the system to allow the proper air flow to operate properly. I was not sure how these were to be attached to the duct, a 4" blast gate did not fit the 4" duct reducer, so I used construction adhesive to glue the two together and then drilled them so I could use #8-32 screws, lock washers, and nuts to make sure they did not come apart.
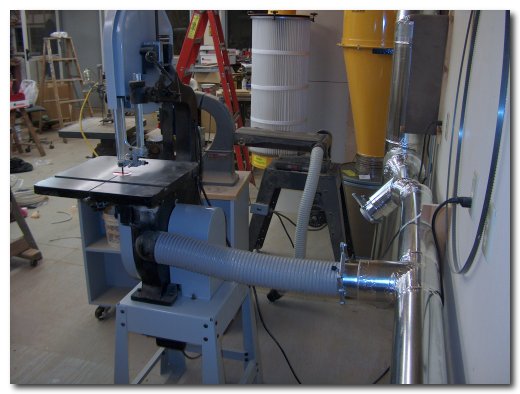
The run along the south wall has four inlets (not including the one for the lathe) and one will be dedicated to the band saw, which is connected with a 4" flex line in the image below. The first one along this run (slanted towards floor) will be shared by the floor model belt sander and jig saw, both using a 2-1/2" flex line. I will use the third one (not in view) as a dedicated inlet for the large router table with a 4" flexible line. The fourth on will have a 2-1/2 line to be used by the drum sander and also as a line for other machines to be rolled over to attach as needed.
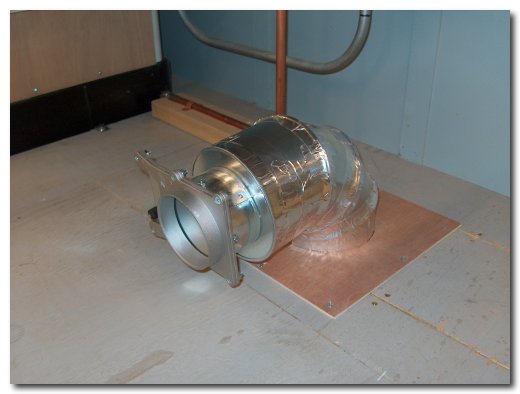
I will have two ports in the middle of the shop for use by machines that can be moved around. The one below is below the table saw extension table. It is connected by the main line under the floor and is a 6" run reduced to a 4" blast gate. I patched the floor around it with the 3/4 plywood flooring and then tightly sealed around it with a piece of 1/4 plywood cut in half to allow installation around the pipe.
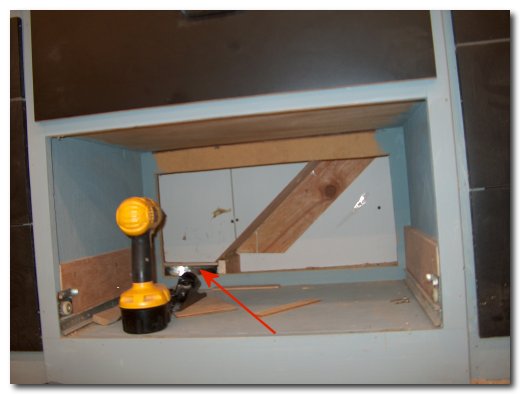
The final, and most difficult activation is the radial arm saw and the two motorized miter box locations. Working on this was a little like building a ship in a bottle. This cabinet was constructed many years ago and was intended to allow the radial arm saw to be free standing and moved around. But now it is permanent and needed to be set away from the wall about 6" leaving a cavity to act as a plenum for dust control.
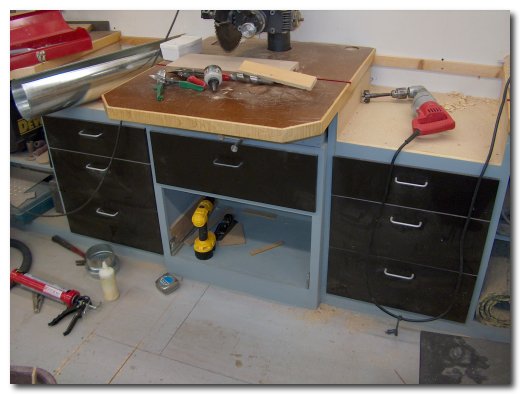
Since the cabinet was permanently mounted I had to work with it in place to complete the activation. The duct entered the base of the cabinet through the floor on the left (red arrow). I attached a reducer made of plywood to reduce it from 6" down to 4-1/2", the glued a piece of 1/4" plywood over the top of it to make a flat floor with the hole through it. My next project took several hours of cutting and fitting but the result was a slanted ramp from the counter top near the miter box down to the duct inlet. Before filling in the opening to this area I used some foam in a can and sealed the metal duct and plywood floor completely. This area was then closed off to make it air tight. Now the dust can travel from the top of the counter right into the duct.
The radial arm saw was a real challenge to devise an collection point. I use this saw very little but wanted it activated in the event that I do use it more in the future. So I constructed a maze, for lack of a better term. The picture below shows it upside down and the red arrows show the path for the air entering the collection point. The blast gate for this one is made with tempered hardboard.
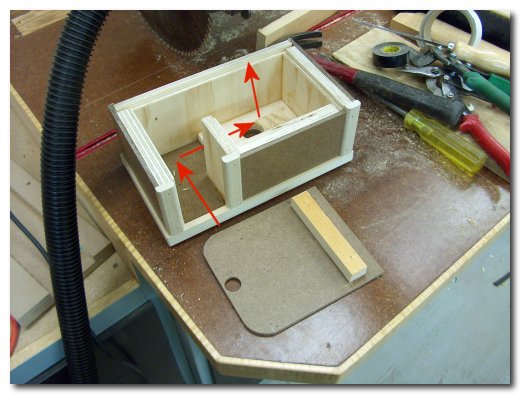
To complete this device I turned it over and placed the blast gate door in place, then screwed it to the wall. The hose from the saw guard was made from a replacment hose for a shop vac. I was impressed with amount of suction through the hose as well as the blade opening.
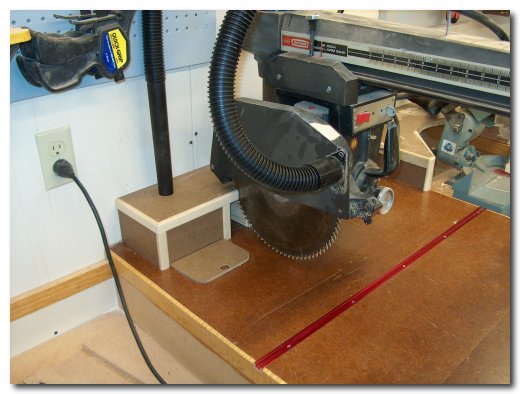
The miter box activation took an entire day's work, even though very little shows. It took a lot of mock-up to determine the best approach to a problem that I have researched on-line. Nearly every site I read indicated that my task had no simple answers. Most sites agreed that the dust port on the blade guard is of little value, in fact a couple remarks made me think closing it up would be the easiest approach. This type of saw is very difficult because of the design. Wood chips leave the blade and hit the rear arm, spreading them in every direction. So I built a hood that allows free travel of the arm in both directions as well as in the compound position. The arrow points to the opening in the side of the cabinet where the suction occurs. There is a slanted florr behind the saw to direct whatever isn't pulled into the port down away from the saw.

This completes all the major dust collection activation. Other equipment will be connected as needed and I will have multiple hoses of different lengths to add flexibility to my connections.
If you have any questions or comments please feel free to send e-mail.
This web site, like the rest of www.breyfogle.com, is self-supported, but occasionally we find a commercial site that we really enjoy working with and will direct you there for further information. We have found Hartville Tools to be a great source of tools at a reasonable price and their website is very easy to navigate. Give them a try.
If you do not see a menu bar on the left you are missing a lot more information like this on www.breyfogle.com