
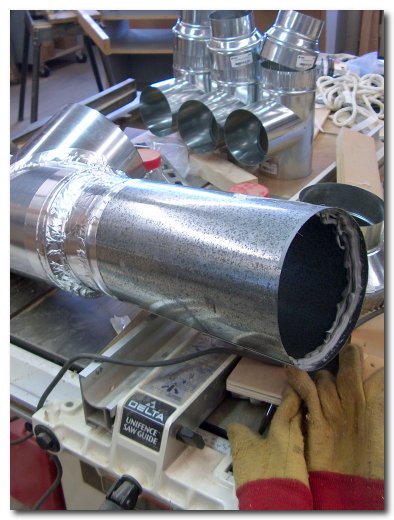
Now that the duct control unit was fully assembled it was time to connect it to the machines through a metal ductwork that was specified by Oneida. The manufactured wanted to sell me the duct itself, but they were very proud of the material and I was able to purchase the 24-guage duct and fittings from a local HVAC supplier at a fraction of the cost. Oneida cautions against using the typical DIY center duct as it is a much lighter guage and may collapse from the suction of the unit.
Since I had changed plans from the time of construction of the shop I had to do some serious cutting to get access to my equipment. I had given up the floor space for the unit, but to go overhead with the duct would have meant loosing more hardwood storage, moving all the light fixtures, and having duct dropping vertically from the ceiling to under the machines as it typically done in most home shops. But since most of the dust I will be moving starts under 3-foot above the floor it made sense to me to route the duct under the floor so the dust would travel less distance and I would not need to look at a lot of exposed duct.
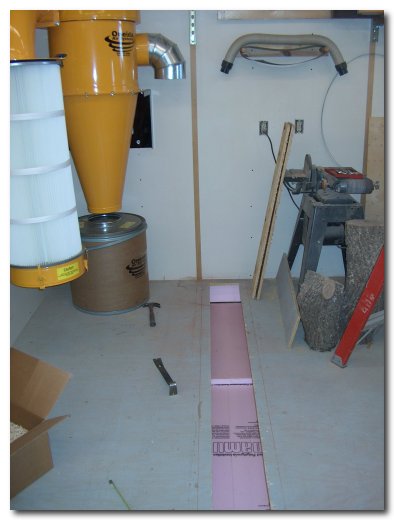
This shop is constructed above grade but there is not a crawl space to gain access to the under floor area, so I decided to cut out the 3/4 plywood floor as is pictured above. As a frame of reference you can see this floor construction method from my shop construction report. The I-Joist were placed on pressure treated sills that were of course covered with heavy plastic sheathing.
I will digress a bit at this point to report on a test of my construction method. I used a digital temperature device and measured the plywood temperature before cutting. It was 61-degrees, just like the air temperature in the shop. When I removed the plywood I tested the styrofoam and it was 59-degrees. I then removed the 1-1/2" styrofoam sheathing to reveal the black plastic ground cover. The temperature of the space at the ground level was 49 degrees at the center of the shop and 45 degrees near the sill. All these temperatures were recorded after more than a week long sub-zero cold spell. It was -14 degrees when I took my readings. I found the joist and foam just as I had installed them with no signs of frost, moisture, or mold. I was very much relieved as I had begun to worry this construction technique.
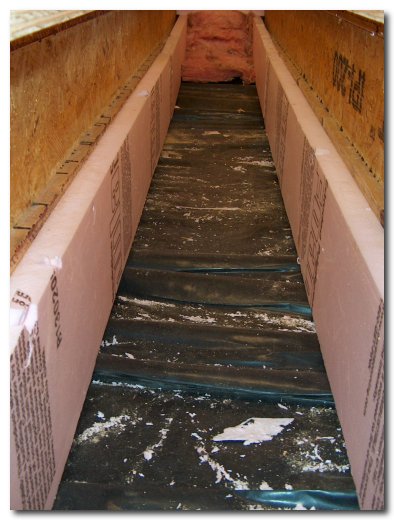
Having established that my floor insulation and vapor barrier was a success I was determined that this modification would not in anyway present a later problem. I was careful not to break the vapor barrier seal and split the foam in half to use as insulation dams on either side of the joist. I tacked these in place with nails and then filled the void with fiberglass batts left over from the old shop when it was torn down. This made it so this section of floor, although deeper than the other voids, is still insulated from the ground that is 10-degrees colder than the rest of the cavities.
The duct work actually began on the north side of the shop because I needed to work towards the dust unit. The crimped ends of the ductwork face the unit unlike a furnace where the crimped ends face away from it. I entered the radial arm saw cabinet in a void I had left behind it and extended 6"- duct from there to under the table saw bench where I have an spare inlet for portable machines. I then converted to 7" duct to a "T" under the table saw. The 7" T is extend up under the saw cabinet and will be finished off later. From there I converted to 8" duct to a T below the jointer.
I used metal duct tape (not the cheap stuff DIYer's use for everything else, grin) on every joint, as well as all other seams in fittings to minimize any loss of suction. When I made the connection between the table saw T and the jointer T I was unable to reach the connection to tape it so decided it would be sealed through an alternate method. I used some siliconized latex caulk and applied a liberal amount all around the inside of the duct knowing that when I slid the pieces together it would smear around the crimped connection providing more seal than if I did nothing. I hung the duct between the joist with galvanized duct strapping or had it resting firmly on structural members. I do not want this duct moving and causing air leaks later.
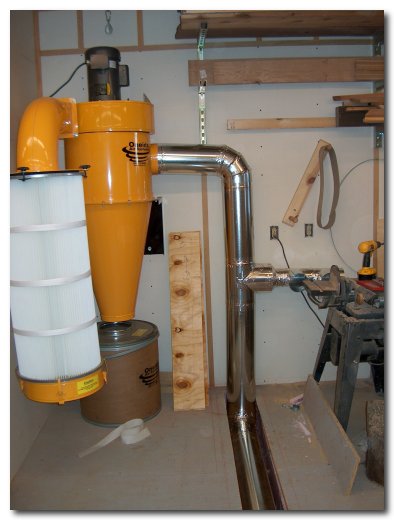
At the end of a long day (about 10-hours) I had installed all the duct from the north side of the building into the dust control unit. You can see a horizontal run that will extend along the south wall for other equipment. I will complete this once the floor is patched up and I have some of the machines running again.
The dust control unit comes pre-wired with a wireless remote starter. So I plugged it in and was very pleased to find suction at all the openings that are running wide open at this point. When completed the jointer opening will be reduced from 8" down to 6" and will have a blast gate to shut it off when not needed. All the other openings, except the table saw, will also have blast gates that will be opened as needed. I designed this system so that the table saw will have constant suction at all times and still have plenty of capacity to run at least one other machine without loosing effeciency.
If you have any questions or comments please feel free to send e-mail.
This web site, like the rest of www.breyfogle.com, is self-supported, but occasionally we find a commercial site that we really enjoy working with and will direct you there for further information. We have found Hartville Tools to be a great source of tools at a reasonable price and their website is very easy to navigate. Give them a try.
If you do not see a menu bar on the left you are missing a lot more information like this on www.breyfogle.com