
This is a place for the amateur woodworker. No snobbery about fancy tools, complicated joints, or exotic finishes, just good honest woodworking for the pure enjoyment of it. My shop has a brand new home in 2003/2004 and we feel blessed to have such a great place to spend time in the hobby of woodworking
Gary's Kitchen
Every now and again life offers a person the chance to live out a dream, and so it is with Gary's kitchen project. I have worked on projects over the last 40-years for so many people, some were customers, many were family members, and as you may have seen on this site, many for our own property. But up to this point, aside from a small deck for one of Brian's homes, I have not had the chance to construct something as significant as a kitchen for one of my sons. When Gary purchased his mountain cabin we immediately asked to be part of the project and we were so pleased that he accepted the offer. And now to be part of the kitchen is truly living a dream.
This project began with our trip to Philipsburg, MT in August of 2013. Although there was some finish work at this time, it was primarily a trip to convert the structure from a multi-purpose garage/hunting retreat, into a snug and warm cabin. We took accurate measurements of the cabin while there and kicked around a few ideas on how to set up the kitchen. The only thing set in stone when we left was the location of the range. We had to establish that location so the LP installer could complete the gas line.
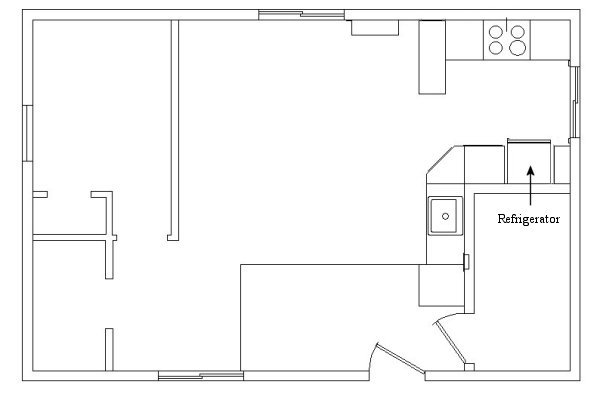
One restriction we had to work with on the design was the location of the kitchen sink. The original owner established the sink location based on the plumbing in the bathroom. The original cabin did not have central heat so in the winter he heated the bathroom with a small electric heater to keep the pipes from freezing. With this restriction we needed to develop a plan that maximized the cabinet and counter space and made the kitchen workable with a sink that was out of the traditional work triangle. We placed the range on the north wall to keep the LP gas in line with the new central heating unit. There is a peninsula extending from the north wall towards the center of the kitchen, this will be large enough to accomodate two bar stools for quick meals.
The refrigerator will be on the south wall of the kitchen area (bathroom wall). There is a small broom closet beside it and counters that extend around the corner to the sink area. To the right of the sink is the washer/dryer stackable pair for laundry. Below is a drawing of the north wall showing the range, cabinets, and peninsula.

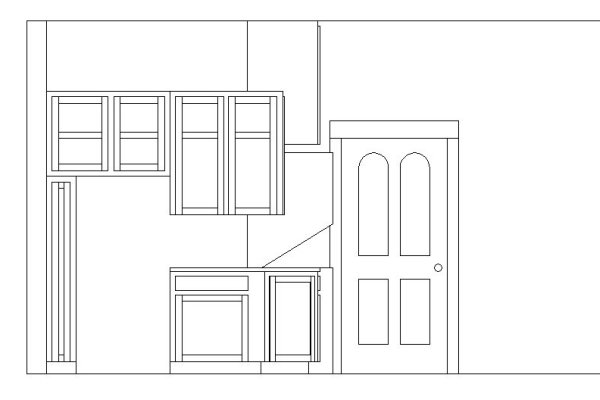
The south wall elevation is a bit busy with all the lines, but it does show the rerigerator space as well as the cabinet arrangement. The door in the background is the entrance door and just to the left of it is the washer/dryer outline.
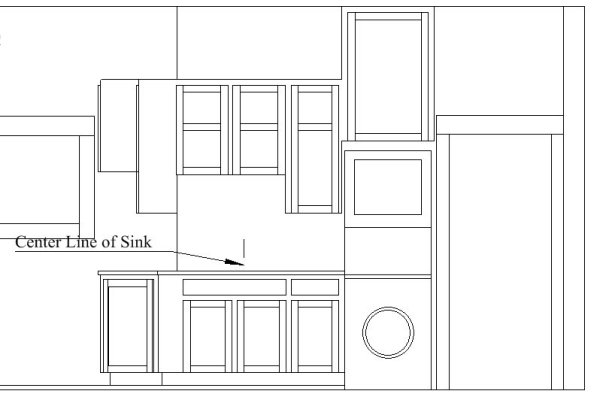
The final elevation is of the east wall, which is also the bathroom wall. There will be a light above the sink to provide task lighting for this area.
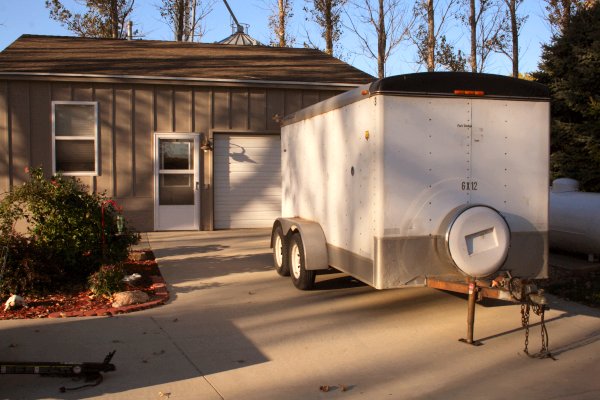
Gary, Sandy, and I worked back and forth over the internet and phone to finalize the plan. I had two ways of completing this project, one was to cut, assemble, dismantle, finish, and haul the pieces to Montana to be reassembled and installed. My brother Doug lined up a trailer for us to borrow that eliminated this idea very quickly. His friend was very generous in loaning us the trailer and this made the second option the best. With this great trailer I was able to design the kitchen in a way that each piece was assembled and finished and hauled ready to hang. This cut the number of days in Montana and the final product will be very much improved.
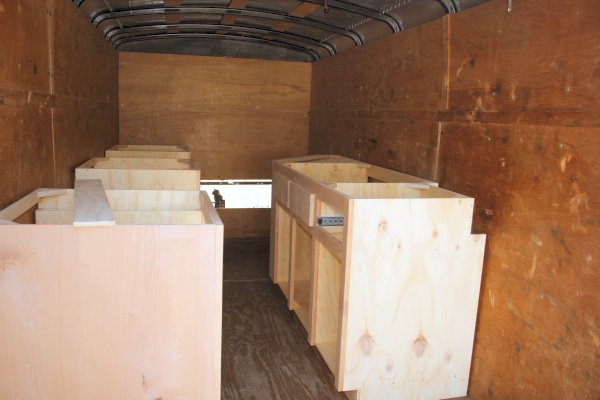
One of our design criteria for the cabinets was to keep them looking like they belonged in a mountain cabin. I did a bit of research and found that my primary hardwood supplier Root River Hardwoods of Albert Lea, MN had the hardwood known as Alder. Although termed a hardwood, it is softer than oak, ash, or maple, but has a beautiful grain and takes stain very well. The other reason for choosing it is that my supplier had it available in a #2, meaning it has tight knots with a lot of grain and character. They also had a beautiful 1/4" sheet good with the same knot and character and both sides are the same cabinet grade veneer. I began construction with the base cabinets and when they were completed I moved them into the trailer for temporary storage awaiting finish.
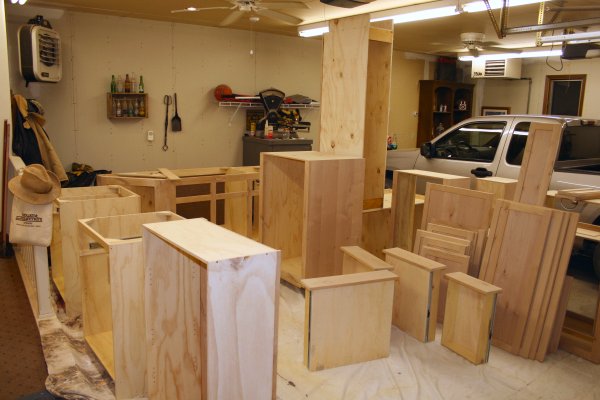
The upper cabinets took a little more time to construct as breaking them into managable units was a bit more complicated. With the cabinets constructed I moved to the doors and made simple panel and frame doors, which will be hung on the cabinets after installation. The picture below shows the cabinets once we moved them from the shop to the house garage. It would have been very difficult to stain and apply the polyurethane finish in the shop with all the construction dust and congested area to work.
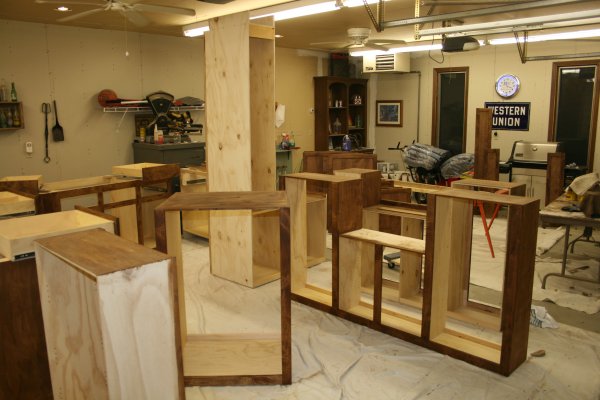
This final picture shows the cabinets after staining. We put both vehicles outdoors while I worked through the finish of all the components. We did apply the clear finish to the interior of the cabinets while they were in the shop. We used water based polyurethane for the interior finish and are pleased with the fast drying finish as well as the low to no odor nature of it.
We will have another page in the next few weeks to show the cabinets once they are installed.
If you have any questions or comments please feel free to send e-mail.
This web site, like the rest of www.breyfogle.com, is self-supported, but occasionally we find a commercial site that we really enjoy working with and will direct you there for further information. We have found Hartville Tools to be a great source of tools at a reasonable price and their website is very easy to navigate. Give them a try.
If you do not see a menu bar on the left you are missing a lot more information like this on www.breyfogle.com